学生レポート
Warning: Invalid argument supplied for foreach() in /home/ladovina/studybagitaly.com/public_html/wp/wp-content/themes/kaban/taxonomy-sr_reporter.php on line 136
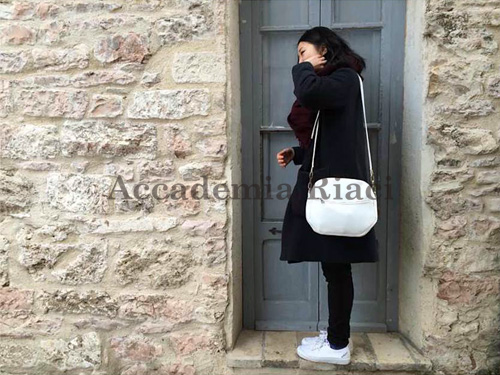
Miss Thacha, after studying various techniques and a unique style in her country from a trainer who graduated at Accademia Riaci, she decided to go to our school to attend our Master course in Bag Making. “I consider Florence as the heart of leather art where not only big industry and traditional artisanship is flourished, but also a place where I can learn and absorb everything around me, keeping my motivation and creativity high all the time”.
She also attended a semester course in Italian Language at ABC de’ Conti.
記事一覧
Warning: array_shift() expects parameter 1 to be array, boolean given in /home/ladovina/studybagitaly.com/public_html/wp/wp-content/themes/kaban/taxonomy-sr_reporter.php on line 154
- Vol.1 Shopping morbida 1 2014.04.22(火)
- Vol.1 Shopping morbida 1 2014.04.22(火)
- Vol.1 Bag Making Course 1 2014.04.22(火)
- Vol.2 Shopping morbida 2 2014.04.23(水)
- Vol.2 Shopping morbida 2 2014.04.23(水)
- Vol.3 Shopping morbida 3 2014.04.24(木)
- Vol.3 Shopping morbida 3 2014.04.24(木)
- Vol.4 Borse Marzo 1 2014.05.02(金)
- Vol.4 Borse Marzo 1 2014.05.02(金)
- Vol.5 Borse Marzo 2 2014.05.09(金)
- Vol.5 Borse Marzo 2 2014.05.09(金)
- Vol.6 Borse Marzo 3 2014.05.15(木)
- Vol.6 Borse Marzo 3 2014.05.15(木)
- Vol.1 About bag making class 2014.06.26(木)
- Vol.1 About bag making class 2014.06.26(木)
- Vol.2 Drawstring Bag 2014.06.27(金)
- Vol.2 Drawstring Bag 2014.06.27(金)
- Vol.1 Bag Making 1- fall 2014 2014.09.15(月)
- Vol.1 カバン制作1 - 2014年秋 2014.09.15(月)
- Vol.2 Fall 2014:BAG MAKING COURSE 1 2014.09.15(月)
- Vol.2 Fall 2014:BAG MAKING COURSE 1 2014.09.15(月)
- Vol.1 Fall 2014:Lunch 2014.09.19(金)
- Vol.1 Fall 2014:Lunch 2014.09.19(金)
- Vol.3 Bag Making 3 - fall 2014 2014.09.24(水)
- Vol.3 Bag Making 3 - fall 2014 2014.09.24(水)
- Vol.2 Fall 2014:HANDMADE BAG LESSON 2014.09.24(水)
- Vol.2 Fall 2014:HANDMADE BAG LESSON 2014.09.24(水)
- Vol.4 Bag Making 4 - fall 2014 2014.09.30(火)
- Vol.4 Bag Making 4 - fall 2014 2014.09.30(火)
- Vol.3 Fall 2014:Glasses case 1 2014.09.30(火)
- Vol.3 Fall 2014:Glasses case 1 2014.09.30(火)
- Vol.5 Bag Making 5 - fall 2014 2014.10.07(火)
- Vol.5 Bag Making 5 - fall 2014 2014.10.07(火)
- Vol.4 Fall 2014:Glasses case 2 2014.10.07(火)
- Vol.4 Fall 2014:Glasses case 2 2014.10.07(火)
- Vol.5 Fall 2014:Glasses case 3 2014.10.13(月)
- Vol.5 Fall 2014:Glasses case 3 2014.10.13(月)
- Vol.6 Bag Making 6 - Fall 2014 2014.10.13(月)
- Vol.6 Bag Making 6 - Fall 2014 2014.10.13(月)
- Vol.7 Bag Making 7 - Fall 2014 2014.10.22(水)
- Vol.7 Bag Making 7 - Fall 2014 2014.10.22(水)
- Vol.6 Fall 2014:Glasses case 4 2014.10.22(水)
- Vol.6 Fall 2014:Glasses case 4 2014.10.22(水)
- Vol.7 Fall 2014:Glasses case 5 2014.10.28(火)
- Vol.7 Fall 2014:Glasses case 5 2014.10.28(火)
- Vol.8 Bag Making 8 - Fall 2014 2014.10.28(火)
- Vol.8 Bag Making 8 - Fall 2014 2014.10.28(火)
- Vol.8 Fall 2014:BAG MAKING COURSE 2 2014.11.04(火)
- Vol.8 Fall 2014:BAG MAKING COURSE 2 2014.11.04(火)
- Vol.9 Bag Making 9 – Fall 2014 2014.11.04(火)
- Vol.9 Bag Making 9 – Fall 2014 2014.11.04(火)
- Vol.10 Bag Making 10 – Fall 2014 2014.11.11(火)
- Vol.10 Bag Making 10 – Fall 2014 2014.11.11(火)
- Vol.9 Fall 2014:BAG MAKING COURSE 3 2014.11.11(火)
- Vol.9 Fall 2014:BAG MAKING COURSE 3 2014.11.11(火)
- Vol.11 Bag Making 11 – Fall 2014 2014.11.18(火)
- Vol.11 Bag Making 11 – Fall 2014 2014.11.18(火)
- Vol.10 Fall 2014:Glasses case 6 2014.11.20(木)
- Vol.10 Fall 2014:Glasses case 6 2014.11.20(木)
- Vol.12 Bag Making 12 – Fall 2014 2014.11.25(火)
- Vol.12 Bag Making 12 – Fall 2014 2014.11.25(火)
- Vol.1 Bag Making Course 1 2014.11.25(火)
- Vol.1 Bag Making Course 1 2014.11.25(火)
- Vol.2 Bag Making Course 2 2014.11.27(木)
- Vol.2 Bag Making Course 2 2014.11.27(木)
- Vol.13 Bag Making 13 – Fall 2014 2014.12.02(火)
- Vol.13 Bag Making 13 – Fall 2014 2014.12.02(火)
- Vol.11 Fall 2014:BAG MAKING COURSE 4 2014.12.05(金)
- Vol.11 Fall 2014:BAG MAKING COURSE 4 2014.12.05(金)
- Vol.14 Living in Florence( Bag Making)– Fall 2014 2014.12.09(火)
- Vol.14 Living in Florence( Bag Making)– Fall 2014 2014.12.09(火)
- Vol.12 Fall 2014:BAG MAKING COURSE 5 2014.12.09(火)
- Vol.12 Fall 2014:BAG MAKING COURSE 5 2014.12.09(火)
- Vol.13 Fall 2014:BAG MAKING COURSE 6 2014.12.12(金)
- Vol.13 Fall 2014:BAG MAKING COURSE 6 2014.12.12(金)
- Vol.15 Bag Making 14 – Fall 2014 2014.12.18(木)
- Vol.15 Bag Making 14 – Fall 2014 2014.12.18(木)
- Vol.14 Fall 2014:BAG MAKING COURSE 7 2014.12.25(木)
- Vol.14 Fall 2014:BAG MAKING COURSE 7 2014.12.25(木)
- Vol.15 Living in Florence(Fall 2014:BAG MAKING COURSE) 2015.01.08(木)
- Vol.15 Living in Florence(Fall 2014:BAG MAKING COURSE) 2015.01.08(木)
- Vol.3 Bag Making Course 3 2015.01.12(月)
- Vol.3 Bag Making Course 3 2015.01.12(月)
- Vol.16 Living in Florence (Bag Making-Spring 2015) 2015.01.26(月)
- Vol.16 Living in Florence (Bag Making-Spring 2015) 2015.01.26(月)
- Vol.17 Bag Making 15 - Spring 2015 2015.02.02(月)
- Vol.17 Bag Making 15 - Spring 2015 2015.02.02(月)
- Vol.4 Bag Making Course 4 2015.02.05(木)
- Vol.4 Bag Making Course 4 2015.02.05(木)
- Vol.16 Spring 2015:BAG MAKING COURSE 1 2015.02.09(月)
- Vol.16 Spring 2015:BAG MAKING COURSE 1 2015.02.09(月)
- Vol.17 Spring 2015:BAG MAKING COURSE 2 2015.02.19(木)
- Vol.17 Spring 2015:BAG MAKING COURSE 2 2015.02.19(木)
- Vol.18 Spring 2015:BAG MAKING COURSE 3 2015.02.23(月)
- Vol.18 Spring 2015:BAG MAKING COURSE 3 2015.02.23(月)
- Vol.19 Spring 2015:BAG MAKING COURSE 4 2015.02.26(木)
- Vol.19 Spring 2015:BAG MAKING COURSE 4 2015.02.26(木)
- Vol.20 Spring 2015:BAG MAKING COURSE 5 2015.05.10(日)
- Vol.20 Spring 2015:BAG MAKING COURSE 5 2015.05.10(日)
- Vol.21 Spring 2015:BAG MAKING COURSE 6 2015.05.13(水)
- Vol.21 Spring 2015:BAG MAKING COURSE 6 2015.05.13(水)
- Vol.5 Bag Making Course 5 2015.05.19(火)
- Vol.5 Bag Making Course 5 2015.05.19(火)
- Vol.22 Spring 2015:BAG MAKING COURSE 7 2015.05.23(土)
- Vol.22 Spring 2015:BAG MAKING COURSE 7 2015.05.23(土)
- Vol.18 Bag Making 16 – Spring 2015 2015.05.30(土)
- Vol.18 Bag Making 16 – Spring 2015 2015.05.30(土)
- Vol.23 Spring 2015:BAG MAKING COURSE 8 2015.10.13(火)
- Vol.23 Spring 2015:BAG MAKING COURSE 8 2015.10.13(火)
- Vol.24 Spring 2015:BAG MAKING COURSE 9 2015.10.13(火)
- Vol.24 Spring 2015:BAG MAKING COURSE 9 2015.10.13(火)
- Vol.6 Bag Making Course 6 2015.10.13(火)
- Vol.6 Bag Making Course 6 2015.10.13(火)
最新記事
VOL.6 Drawstring Bag
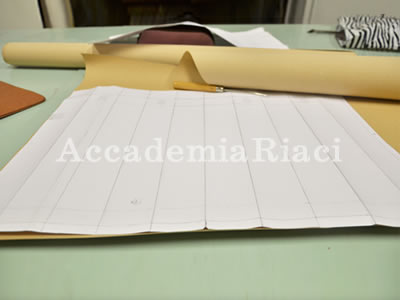
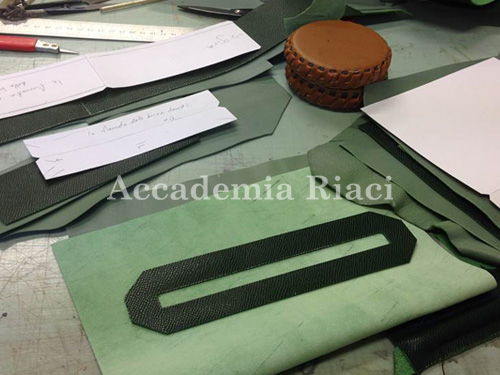
1. A stencil of the parts are made out of cardboard before they are cut from a sheet of leather.
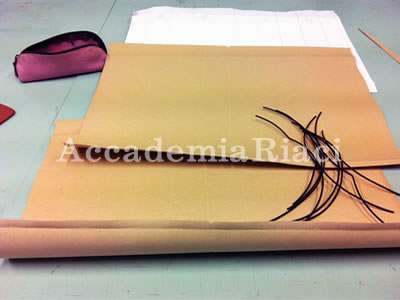
2. After making a model from a cardboard then test the bag’s from onto Salpa, a material recycle from leather.
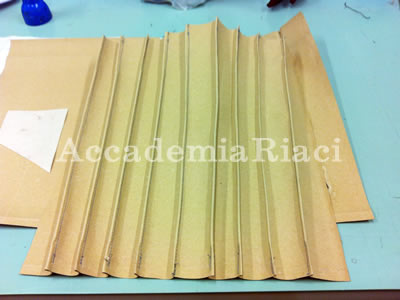
3. Salpa can be sewn by sewing machine.
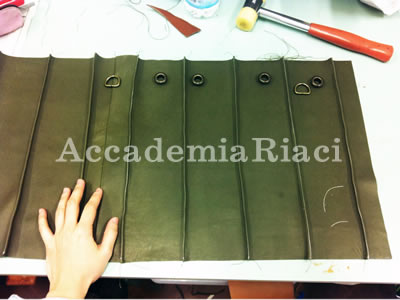
4. Bag’s body part in progress before be sewn with the bottom part.
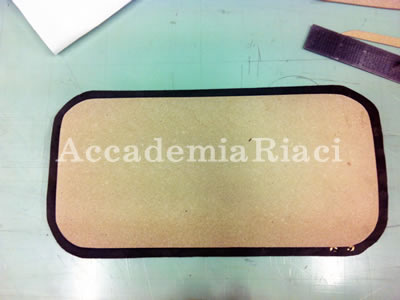
5. Bag’s base part in progress. As you can see, Salpa is added onto the base to give it some strength and structure.
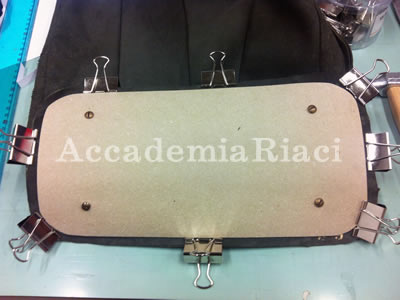
6. Studs are fitted on to the bag’s base and after that the base part will be sewn with the body part.
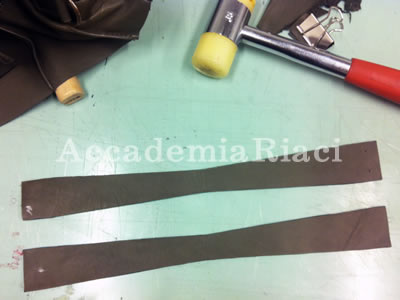
7. Strap parts, it be sewn after.
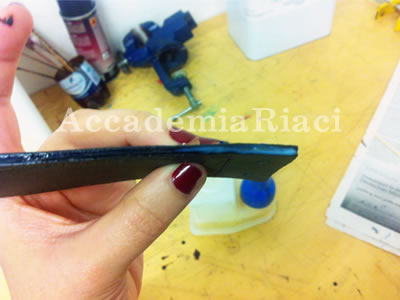
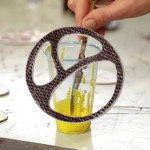
8. Coloring the edge of leather to make the layer of leather be invisible.
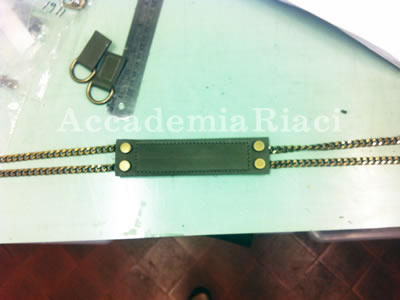
9. The strap part, chains and leather are combined with rivets and it be sewn with the body part after.
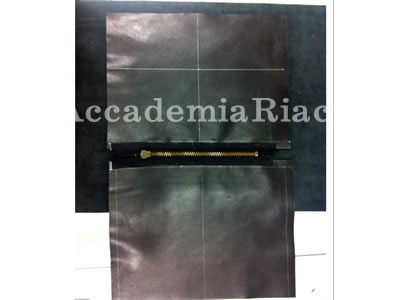
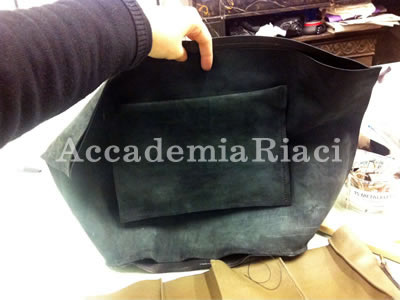
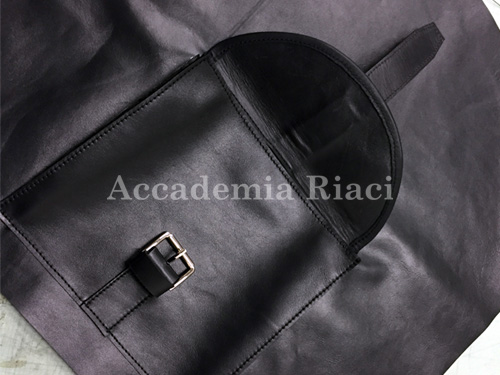
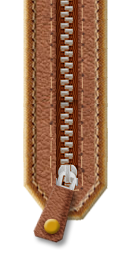
10. A zip pocket inside the bag need to be made before it be sewn onto the lining.
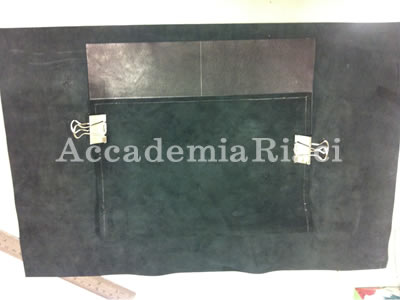
11. Back view of the pocket in progress.
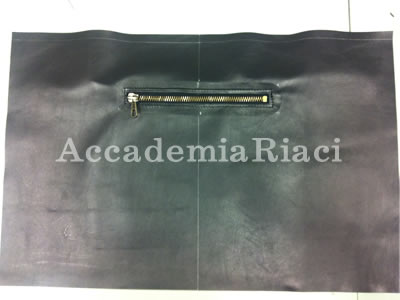
12. Front view of the pocket in progress.
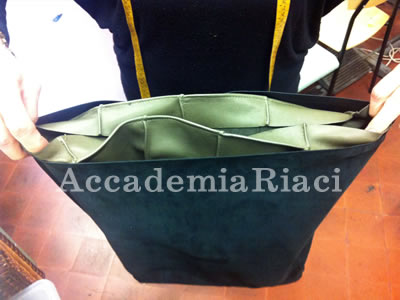
14. Sew the lining with the body part and after sew it together then flip it over.
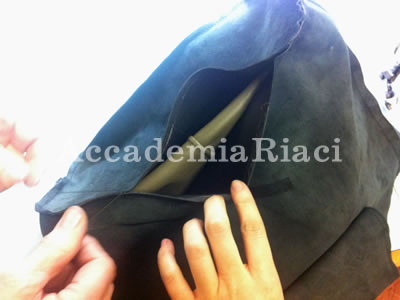
15. After the lining is sewn with the body part, it’s necessary to leave a hole for flipping the body part over and sew to close it after.
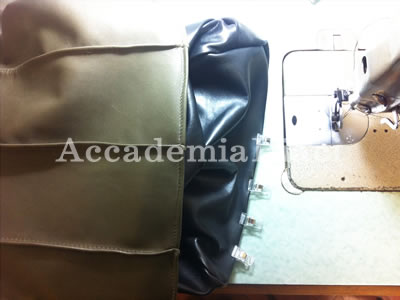
16. Sew the hole which be left after flip the body part over.
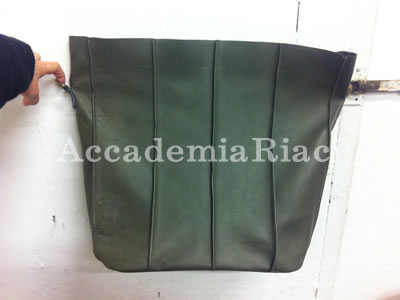
17. Front view of the bag after sew it with the lining.
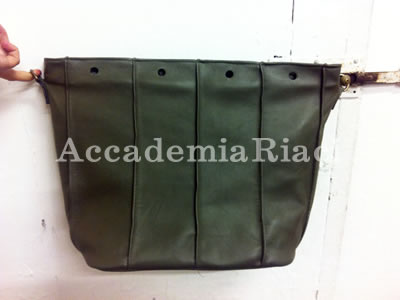
18. Pierce the top of the bag to insert a tiny sling through it for closing the bag.
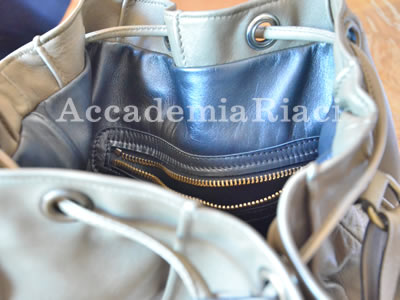
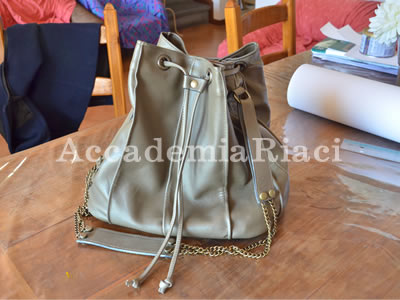
19. The completed bag with the details.
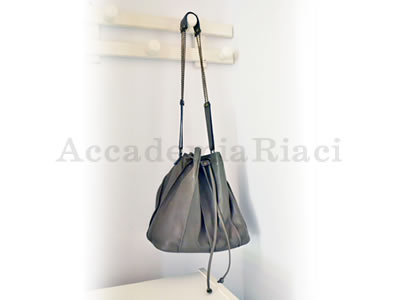
21. My drawstring bag is done.
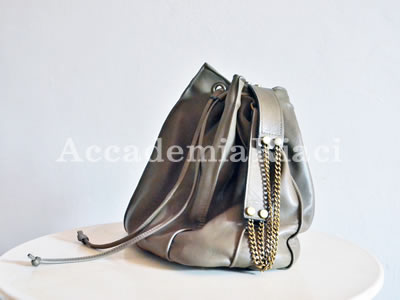
22. My drawstring bag is done.
記事一覧
Warning: array_shift() expects parameter 1 to be array, boolean given in /home/ladovina/studybagitaly.com/public_html/wp/wp-content/themes/kaban/taxonomy-sr_reporter.php on line 207
- Vol.1 Shopping morbida 1 2014.04.22(火)
- Vol.1 Shopping morbida 1 2014.04.22(火)
- Vol.1 Bag Making Course 1 2014.04.22(火)
- Vol.2 Shopping morbida 2 2014.04.23(水)
- Vol.2 Shopping morbida 2 2014.04.23(水)
- Vol.3 Shopping morbida 3 2014.04.24(木)
- Vol.3 Shopping morbida 3 2014.04.24(木)
- Vol.4 Borse Marzo 1 2014.05.02(金)
- Vol.4 Borse Marzo 1 2014.05.02(金)
- Vol.5 Borse Marzo 2 2014.05.09(金)
- Vol.5 Borse Marzo 2 2014.05.09(金)
- Vol.6 Borse Marzo 3 2014.05.15(木)
- Vol.6 Borse Marzo 3 2014.05.15(木)
- Vol.1 About bag making class 2014.06.26(木)
- Vol.1 About bag making class 2014.06.26(木)
- Vol.2 Drawstring Bag 2014.06.27(金)
- Vol.2 Drawstring Bag 2014.06.27(金)
- Vol.1 Bag Making 1- fall 2014 2014.09.15(月)
- Vol.1 カバン制作1 - 2014年秋 2014.09.15(月)
- Vol.2 Fall 2014:BAG MAKING COURSE 1 2014.09.15(月)
- Vol.2 Fall 2014:BAG MAKING COURSE 1 2014.09.15(月)
- Vol.1 Fall 2014:Lunch 2014.09.19(金)
- Vol.1 Fall 2014:Lunch 2014.09.19(金)
- Vol.3 Bag Making 3 - fall 2014 2014.09.24(水)
- Vol.3 Bag Making 3 - fall 2014 2014.09.24(水)
- Vol.2 Fall 2014:HANDMADE BAG LESSON 2014.09.24(水)
- Vol.2 Fall 2014:HANDMADE BAG LESSON 2014.09.24(水)
- Vol.4 Bag Making 4 - fall 2014 2014.09.30(火)
- Vol.4 Bag Making 4 - fall 2014 2014.09.30(火)
- Vol.3 Fall 2014:Glasses case 1 2014.09.30(火)
- Vol.3 Fall 2014:Glasses case 1 2014.09.30(火)
- Vol.5 Bag Making 5 - fall 2014 2014.10.07(火)
- Vol.5 Bag Making 5 - fall 2014 2014.10.07(火)
- Vol.4 Fall 2014:Glasses case 2 2014.10.07(火)
- Vol.4 Fall 2014:Glasses case 2 2014.10.07(火)
- Vol.5 Fall 2014:Glasses case 3 2014.10.13(月)
- Vol.5 Fall 2014:Glasses case 3 2014.10.13(月)
- Vol.6 Bag Making 6 - Fall 2014 2014.10.13(月)
- Vol.6 Bag Making 6 - Fall 2014 2014.10.13(月)
- Vol.7 Bag Making 7 - Fall 2014 2014.10.22(水)
- Vol.7 Bag Making 7 - Fall 2014 2014.10.22(水)
- Vol.6 Fall 2014:Glasses case 4 2014.10.22(水)
- Vol.6 Fall 2014:Glasses case 4 2014.10.22(水)
- Vol.7 Fall 2014:Glasses case 5 2014.10.28(火)
- Vol.7 Fall 2014:Glasses case 5 2014.10.28(火)
- Vol.8 Bag Making 8 - Fall 2014 2014.10.28(火)
- Vol.8 Bag Making 8 - Fall 2014 2014.10.28(火)
- Vol.8 Fall 2014:BAG MAKING COURSE 2 2014.11.04(火)
- Vol.8 Fall 2014:BAG MAKING COURSE 2 2014.11.04(火)
- Vol.9 Bag Making 9 – Fall 2014 2014.11.04(火)
- Vol.9 Bag Making 9 – Fall 2014 2014.11.04(火)
- Vol.10 Bag Making 10 – Fall 2014 2014.11.11(火)
- Vol.10 Bag Making 10 – Fall 2014 2014.11.11(火)
- Vol.9 Fall 2014:BAG MAKING COURSE 3 2014.11.11(火)
- Vol.9 Fall 2014:BAG MAKING COURSE 3 2014.11.11(火)
- Vol.11 Bag Making 11 – Fall 2014 2014.11.18(火)
- Vol.11 Bag Making 11 – Fall 2014 2014.11.18(火)
- Vol.10 Fall 2014:Glasses case 6 2014.11.20(木)
- Vol.10 Fall 2014:Glasses case 6 2014.11.20(木)
- Vol.12 Bag Making 12 – Fall 2014 2014.11.25(火)
- Vol.12 Bag Making 12 – Fall 2014 2014.11.25(火)
- Vol.1 Bag Making Course 1 2014.11.25(火)
- Vol.1 Bag Making Course 1 2014.11.25(火)
- Vol.2 Bag Making Course 2 2014.11.27(木)
- Vol.2 Bag Making Course 2 2014.11.27(木)
- Vol.13 Bag Making 13 – Fall 2014 2014.12.02(火)
- Vol.13 Bag Making 13 – Fall 2014 2014.12.02(火)
- Vol.11 Fall 2014:BAG MAKING COURSE 4 2014.12.05(金)
- Vol.11 Fall 2014:BAG MAKING COURSE 4 2014.12.05(金)
- Vol.14 Living in Florence( Bag Making)– Fall 2014 2014.12.09(火)
- Vol.14 Living in Florence( Bag Making)– Fall 2014 2014.12.09(火)
- Vol.12 Fall 2014:BAG MAKING COURSE 5 2014.12.09(火)
- Vol.12 Fall 2014:BAG MAKING COURSE 5 2014.12.09(火)
- Vol.13 Fall 2014:BAG MAKING COURSE 6 2014.12.12(金)
- Vol.13 Fall 2014:BAG MAKING COURSE 6 2014.12.12(金)
- Vol.15 Bag Making 14 – Fall 2014 2014.12.18(木)
- Vol.15 Bag Making 14 – Fall 2014 2014.12.18(木)
- Vol.14 Fall 2014:BAG MAKING COURSE 7 2014.12.25(木)
- Vol.14 Fall 2014:BAG MAKING COURSE 7 2014.12.25(木)
- Vol.15 Living in Florence(Fall 2014:BAG MAKING COURSE) 2015.01.08(木)
- Vol.15 Living in Florence(Fall 2014:BAG MAKING COURSE) 2015.01.08(木)
- Vol.3 Bag Making Course 3 2015.01.12(月)
- Vol.3 Bag Making Course 3 2015.01.12(月)
- Vol.16 Living in Florence (Bag Making-Spring 2015) 2015.01.26(月)
- Vol.16 Living in Florence (Bag Making-Spring 2015) 2015.01.26(月)
- Vol.17 Bag Making 15 - Spring 2015 2015.02.02(月)
- Vol.17 Bag Making 15 - Spring 2015 2015.02.02(月)
- Vol.4 Bag Making Course 4 2015.02.05(木)
- Vol.4 Bag Making Course 4 2015.02.05(木)
- Vol.16 Spring 2015:BAG MAKING COURSE 1 2015.02.09(月)
- Vol.16 Spring 2015:BAG MAKING COURSE 1 2015.02.09(月)
- Vol.17 Spring 2015:BAG MAKING COURSE 2 2015.02.19(木)
- Vol.17 Spring 2015:BAG MAKING COURSE 2 2015.02.19(木)
- Vol.18 Spring 2015:BAG MAKING COURSE 3 2015.02.23(月)
- Vol.18 Spring 2015:BAG MAKING COURSE 3 2015.02.23(月)
- Vol.19 Spring 2015:BAG MAKING COURSE 4 2015.02.26(木)
- Vol.19 Spring 2015:BAG MAKING COURSE 4 2015.02.26(木)
- Vol.20 Spring 2015:BAG MAKING COURSE 5 2015.05.10(日)
- Vol.20 Spring 2015:BAG MAKING COURSE 5 2015.05.10(日)
- Vol.21 Spring 2015:BAG MAKING COURSE 6 2015.05.13(水)
- Vol.21 Spring 2015:BAG MAKING COURSE 6 2015.05.13(水)
- Vol.5 Bag Making Course 5 2015.05.19(火)
- Vol.5 Bag Making Course 5 2015.05.19(火)
- Vol.22 Spring 2015:BAG MAKING COURSE 7 2015.05.23(土)
- Vol.22 Spring 2015:BAG MAKING COURSE 7 2015.05.23(土)
- Vol.18 Bag Making 16 – Spring 2015 2015.05.30(土)
- Vol.18 Bag Making 16 – Spring 2015 2015.05.30(土)
- Vol.23 Spring 2015:BAG MAKING COURSE 8 2015.10.13(火)
- Vol.23 Spring 2015:BAG MAKING COURSE 8 2015.10.13(火)
- Vol.24 Spring 2015:BAG MAKING COURSE 9 2015.10.13(火)
- Vol.24 Spring 2015:BAG MAKING COURSE 9 2015.10.13(火)
- Vol.6 Bag Making Course 6 2015.10.13(火)
- Vol.6 Bag Making Course 6 2015.10.13(火)


 日本人留学カウンセラーがご対応致します。




コメントを残す